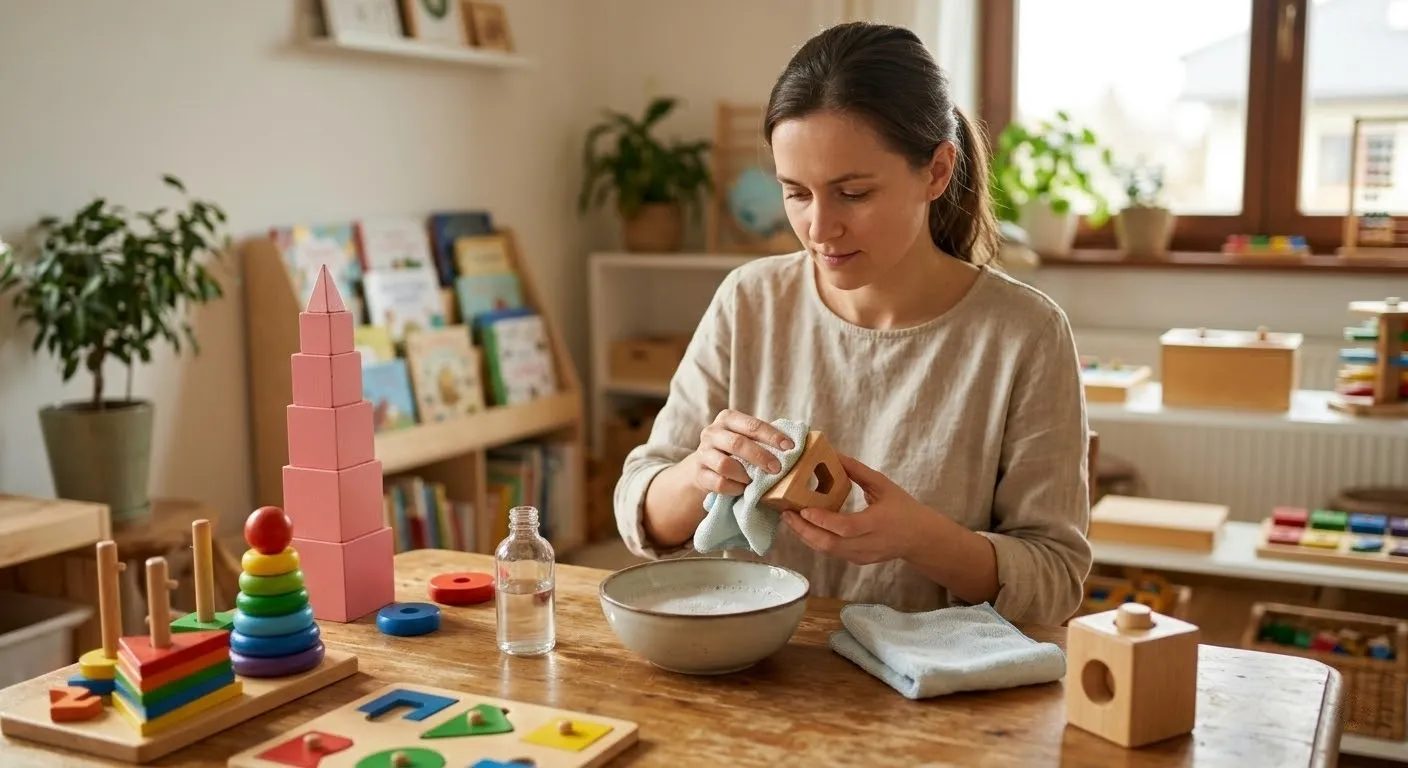
Wooden Montessori toys are designed to last for years, but toddlers put them in their mouths, drop them on floors, and use them during messy play. Naturally, you want to keep these toys clean and hygienic.
| How to Clean Wooden Montessori Toys Safely? To clean wooden Montessori toys safely: wipe with a damp cloth using mild soap or diluted vinegar (1 tablespoon vinegar per cup of water), never soak or use dishwashers, and dry immediately with a clean cloth. This gentle method preserves the wood and non-toxic finishes while maintaining hygiene. |
In this guide, you’ll learn how to clean, sanitize, and care for wooden toys to keep them safe and long-lasting.
Why Wooden Montessori Toys Need Special Cleaning Care
Wood is a porous natural material, which means it absorbs moisture differently than plastic. Proper cleaning helps maintain the wood surface, non-toxic finishes, and the overall durability of the toy.
Harsh cleaning methods can cause real damage—warping, cracking, finish deterioration, or weakened joints.
Wood Is a Natural Material
Wood fibers absorb moisture. When wooden toys get too wet, they can swell, warp, or develop cracks along the grain.
Soaking toys—even briefly—can cause:
- Expansion of wood fibers
- Separation of glued joints
- Surface roughness
- Long-term structural damage
Montessori Toys Often Use Natural Finishes
Many high-quality wooden toys use beeswax, plant-based oils, or water-based paints rather than synthetic sealants. These finishes are chosen because they’re non-toxic and safe for mouthing. Understanding what makes wooden toys safe for babies, including finish types and safety certifications, helps you choose toys that require minimal but proper cleaning care.
But they also require gentler cleaning. Harsh chemicals or excessive water can strip these protective layers, leaving the raw wood exposed.
Proper Care Helps Toys Last for Years
Montessori materials are designed for long-term use—sometimes serving multiple children across years. Regular, appropriate cleaning helps preserve both hygiene and durability.
A well-maintained wooden toy can literally last decades. Poor cleaning habits? That same toy might deteriorate within months.
How Often Should You Clean Wooden Montessori Toys?
Daily Cleaning Situations
Some situations require immediate cleaning:
- When a toy was mouthed heavily – If your baby spent 20 minutes gnawing on a wooden teether, wipe it down before storage.
- When a toy dropped outside – Outdoor dirt and bacteria warrant cleaning before the toy goes back into rotation.
- When exposed to food or liquids – Sticky hands, spilled milk, or dropped snacks mean the toy needs attention now, not later.
Regular Cleaning Routine
For toys in regular rotation:
- Light wipe weekly – A quick pass with a damp cloth removes dust and surface dirt
- Deeper cleaning monthly – Use your vinegar solution or mild soap for more thorough cleaning
This schedule works for most families. Adjust based on how heavily the toys are used and your child’s age. Younger babies who mouth everything? Clean more frequently.
When Sanitizing Is Necessary
Deeper sanitizing makes sense when:
- Illness in the household – After stomach bugs or contagious illness, sanitize toys your sick child used
- Toys shared between children – Playgroup toys or daycare materials need regular sanitizing
- After long storage – Toys coming out of storage after months deserve a good cleaning
How to Clean Wooden Montessori Toys (Step-by-Step)
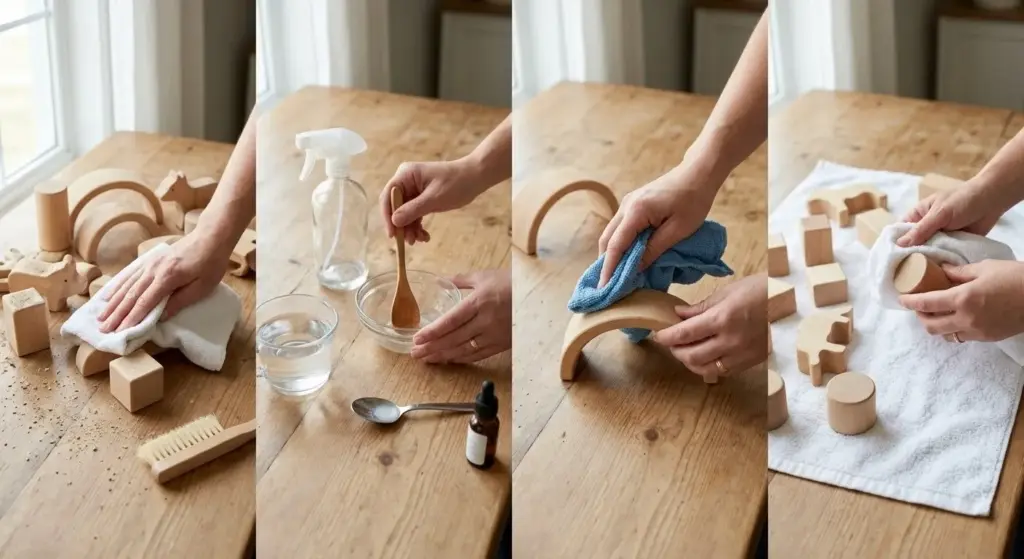
Step 1: Wipe Off Dust and Debris
Start dry. Use a soft, dry cloth or a soft-bristled brush to remove loose dust, crumbs, or dirt.
This prevents you from just smearing dirt around when you add moisture.
Step 2: Prepare a Gentle Cleaning Solution
Best options:
Warm water + mild soap:
- Use fragrance-free, non-toxic dish soap
- Just a few drops in a small bowl of warm water
Diluted vinegar solution:
- 1 cup warm water
- 1 tablespoon white vinegar
- Mix in a small bowl or spray bottle
The vinegar solution is my go-to. It’s naturally antibacterial, safe when diluted, and doesn’t leave residue.
Step 3: Wipe the Toy (Do Not Soak)
Dip your cloth into the cleaning solution and wring it out thoroughly. The cloth should be damp, not dripping.
Wipe all surfaces of the toy gently but thoroughly. Pay attention to:
- Corners and crevices where dirt hides
- Areas your child mouths most
- Any visible stains or sticky spots
Never submerge the toy. Never let it sit in water. Just wipe.
Step 4: Dry Immediately
This step is crucial. Use a clean, dry cloth to wipe away all moisture. Then let the toy air dry completely in a well-ventilated area before putting it away.
Clean toys in the evening and let them air dry overnight on a clean towel before returning them to the shelf the next morning.
Never put wooden toys away wet. Trapped moisture breeds mold and damages wood.
Natural Cleaning Solutions Safe for Wooden Toys
Vinegar Cleaning Solution
White vinegar is a mild disinfectant that’s natural, safe when diluted, and effective for everyday cleaning.
Proper dilution:
- 1 tablespoon vinegar per 1 cup water
- Never use vinegar full-strength on toys
The smell dissipates as it dries. By the time the toy is completely dry, there’s no vinegar odor remaining.
There’s also a layer of protection that wood itself provides. A 2005 study published in Holzforschung tracked E. coli and Enterococcus faecium survival on seven European wood species — pine, oak, beech, maple, spruce, larch, and poplar — compared to polyethylene plastic. Bacterial counts decreased significantly faster on wood than on plastic across all species tested, with pine and oak showing the most pronounced effect. The mechanism is twofold: wood’s hygroscopic structure draws moisture inward, depriving bacteria of surface conditions for replication; and many hardwoods contain natural tannins and phenolic compounds that actively inhibit microbial growth. This doesn’t mean wood is self-cleaning — regular wiping is still essential — but it does mean that a properly dried wooden toy left on a shelf is actively less hospitable to bacteria than a plastic one sitting in the same spot.
Mild Soap and Warm Water
Simple and effective for everyday cleaning. Choose fragrance-free, non-toxic soap—the kind you’d use to wash baby bottles works perfectly.
Just remember: less is more. You don’t need sudsy water. A tiny amount of soap goes a long way.
Lemon and Water (Optional Natural Cleaner)
Lemon has mild antibacterial properties and smells pleasant. Mix fresh lemon juice with water (similar ratio to vinegar).
Use this sparingly. The acidity can affect some finishes if used too frequently, so save it for occasional deep cleaning rather than weekly maintenance.
Cleaning Wooden Toys After Illness (Sanitizing Safely)
When someone in your household has been sick, you naturally want to sanitize toys more thoroughly. The CDC recommends regular toy cleaning as part of preventing illness transmission, especially in shared play environments.
Use a Diluted Vinegar Solution
The same vinegar solution works for sanitizing. You can increase the concentration slightly (2 tablespoons vinegar per cup of water) for deeper disinfecting.
Wipe thoroughly, making sure to cover all surfaces. Let the solution sit on the toy for 1-2 minutes before wiping dry.
Allow Complete Drying
After illness-related cleaning, be extra thorough about drying. Moisture left in wood can cause damage, and you want these toys completely dry before they go back into use.
Set them in a sunny spot or near (not on) a gentle heat source to speed drying.
Avoid Harsh Chemical Disinfectants
Harsh chemicals can:
- Damage natural finishes
- Leave toxic residue
- Degrade the wood over time
- Create safety concerns if not fully rinsed (and you can’t fully rinse wood without soaking it)
Avoid:
- Bleach solutions
- Rubbing alcohol
- Strong antibacterial sprays
- Commercial disinfectants with harsh chemicals
The gentle methods work. Trust them.
What NOT to Do When Cleaning Wooden Toys
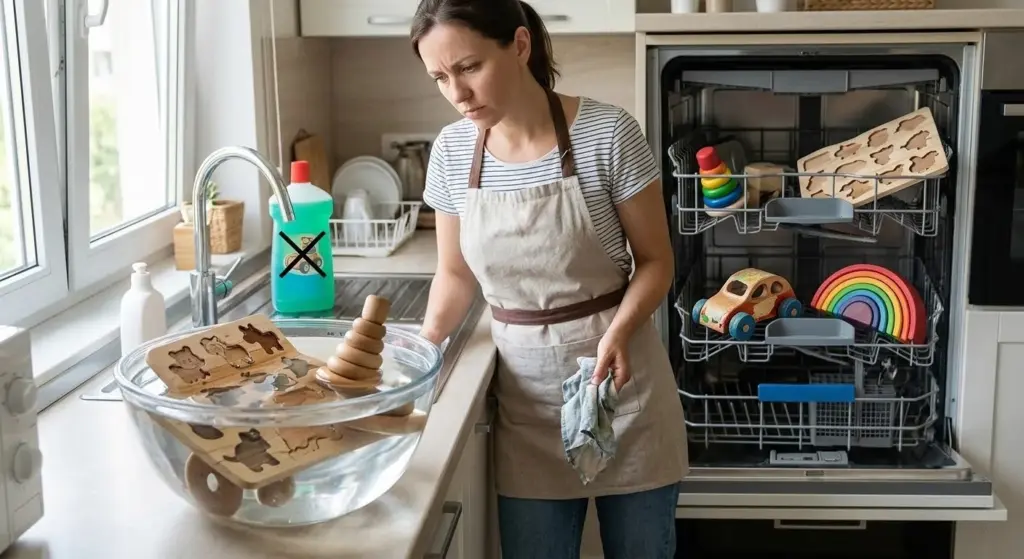
Do Not Soak Wooden Toys
This bears repeating because it’s the most common mistake. Soaking—even in clean water—can cause swelling, cracking, and separation of glued parts.
A wooden puzzle left in bathwater for 10 minutes? Likely ruined. The pieces swell, the paint bubbles, the smooth edges become rough.
Do Not Use Dishwashers
Dishwashers expose wood to high heat, high pressure water jets, and extended moisture. This is the wooden toy equivalent of a destructive stress test.
I’ve seen photos of wooden toys that went through the dishwasher. They come out warped, with peeling paint and separated pieces. Just don’t.
Avoid Harsh Chemicals
Beyond the damage concerns, harsh chemicals can leave residue. Your baby mouths these toys. Chemical residue isn’t something you want anywhere near their mouth.
Do Not Leave Toys Wet
Even after gentle cleaning, leaving toys wet invites problems. Mold can develop within 24-48 hours in damp wood. The finish can cloud or peel.
Always dry thoroughly. Always.
How to Maintain Wooden Montessori Toys Long-Term
Cleaning is only part of proper care. Maintenance extends toy lifespan significantly.
Regular Inspection
Every few weeks, examine toys closely:
Check for:
- Cracks in the wood
- Loose parts or connections
- Rough surfaces or splinters
- Chipping paint or finish
Catch problems early and you can often address them before the toy becomes unsafe.
Proper Storage
Store toys:
- In dry areas away from bathrooms or kitchens
- Away from direct sunlight (which can fade finishes)
- In containers with good air circulation
- Off floors where moisture might collect
We keep our wooden toys on open shelves in the playroom—a naturally dry area with good airflow.
Toy Rotation
Montessori recommends rotating toys to reduce wear and encourage sustained engagement. This also gives you natural opportunities to clean toys thoroughly before they go into storage.
Every 2-3 weeks, we rotate out about half the toys. Clean them, inspect them, let them rest. This practice has kept our toys in excellent condition for years.
Cleaning as a Practical Life Activity
Here’s a reframe that changes everything about toy cleaning: in Montessori, wiping down a toy isn’t a chore you do after your child — it’s an activity you do with them. 🧺
AMI recognizes Practical Life as one of the four core curriculum areas in Montessori education for ages 1–6 — work that develops hand control, concentration, and care for the environment through real, purposeful tasks like wiping, pouring, and carrying.
It covers exactly this kind of purposeful, real-world work: wiping, pouring, carrying, caring for objects. When a 2-year-old helps you wipe down their wooden puzzle with a damp cloth, they’re not “helping with cleaning.” They’re building hand control, developing concentration, learning cause and effect (wet cloth → clean toy), and internalizing that their belongings deserve care.
How to include your toddler:
- 18–24 months: Give them their own small, slightly damp cloth. Let them wipe the flat surfaces of blocks or puzzle boards while you handle crevices. The goal is participation, not precision.
- 2–3 years: They can do a full wipe of simple toys themselves. Show them once, slowly, then step back. Resist the urge to redo it.
- 3–4 years: Introduce the full sequence — damp cloth, wipe, dry cloth, return toy to shelf. This becomes a complete work cycle, just like any other Montessori activity.
| I’ve seen three-year-olds spend 15 focused minutes wiping down their shelf toys. Not because I asked them to — because once you show them that their materials need care, they want to do it. It’s the same drive that makes them want to pour their own water. – Zoe Paul – AMI Teacher Trainer 0-3, M.Ed |
The practical benefit for you: toys get cleaned more regularly because it’s built into play time rather than added onto your to-do list. The developmental benefit for them: a real skill, real responsibility, real pride.
How to Oil and Repair Wooden Montessori Toys — The Restoration Guide
Wood dries out. Paint chips. Edges roughen after hundreds of hours of small hands working with them. None of this means the toy is finished — it means the toy has been used, which is exactly what it was designed for. Most wooden toy damage is reversible with 15 minutes and a few household supplies.
When and How to Re-Oil
Oil restores the protective layer that keeps wood from drying, cracking, and absorbing stains. You’ll know a toy needs oiling when the surface looks pale, feels rough to the touch, or no longer has the slight warmth it had when new. The 21 CFR § 172.878 — the federal food additive regulation governing white mineral oil — permits its use directly in food, confirming the safety standard that makes food-grade mineral oil appropriate for wooden surfaces children will mouth.
- What to use: Food-grade mineral oil, fractionated coconut oil, or beeswax polish. All three are non-toxic, tasteless after curing, and safe for toys your child mouths. Avoid olive oil and vegetable oil — both can turn rancid over time.
- The process (10 minutes):
Apply a thin layer with a soft cloth — a little goes further than you’d expect. Let it absorb for 15–20 minutes. Buff away all excess with a clean dry cloth until the surface feels smooth, not sticky. Let the toy rest overnight before returning it to the shelf. One coat is enough for maintenance; two coats for toys that haven’t been oiled in over a year.
- How often: Every 3–6 months for toys in heavy daily rotation. Once or twice a year for toys in storage rotation. Painted or sealed toys don’t need oiling — this applies to natural-finish and oil-finish pieces only.
Fixing Rough Spots and Minor Splinters
A raised grain or small rough patch doesn’t mean the toy is unsafe — it means the wood has absorbed and released moisture unevenly, which is normal wear. Sand the rough area gently with fine-grit sandpaper (220 grit or higher) in the direction of the grain — never across it. Wipe away dust with a slightly damp cloth, let dry, then oil the sanded area. The finish will look and feel like new.
For a small splinter that hasn’t detached: sand it flat rather than trying to pull it out, which can tear the grain deeper.
Tightening Loose Joints and Wobbly Parts
Wooden toys assembled with dowels or press-fit joints can loosen over time. Before reaching for glue, try this: remove the loose piece, apply a thin coat of wood glue (non-toxic, child-safe — Titebond III is food-safe when cured) to both surfaces, press together firmly, and wipe away any squeeze-out immediately. Clamp or weight the joint for 30 minutes. Let cure for 24 hours before your child uses it again.
If a dowel joint has become too loose for glue alone, wrap the dowel end once with a thin strip of cotton cloth dipped in glue before reinserting. This fills the gap without changing the fit permanently.
Refreshing Faded Paint
Water-based toy paint fades with UV exposure and years of handling. Small touch-ups are straightforward: use non-toxic, water-based acrylic paint matched to the original color. Apply with a small brush in thin coats, letting each coat dry fully before adding the next. Two thin coats look better and last longer than one thick coat. Let the repaired toy cure for 48 hours before it returns to the shelf — water-based paint is safe when fully cured but should not be mouthed while still tacky.
For toys where the paint is chipping rather than fading, sand the chipped area lightly (220 grit), wipe clean, then repaint. Chipping paint is a safety concern for children who mouth toys — address it promptly or remove the toy from rotation until repaired.
When to Retire a Toy Instead of Repairing It
Not everything is worth fixing. Retire a toy when: a crack has split through the structural body (not just the surface), a piece has broken into small fragments that create a choking hazard, or the wood has developed mold that has penetrated below the surface (black staining that doesn’t sand out). A toy with surface wear is a toy with history. A toy with structural failure is a safety risk.
Why Proper Care Extends the Life of Wooden Toys
Wooden toys often last longer than plastic alternatives when properly maintained—sometimes serving multiple children across years.
Benefits include:
Long lifespan – Well-cared-for wooden toys can last decades.
Sustainable use – Toys that last reduce waste and the need for constant replacement. One quality wooden toy serving three children is more sustainable than nine plastic toys across those same years.
Ability to pass toys to younger siblings – Proper maintenance means toys stay beautiful and functional enough to hand down with pride. These durability and sustainability benefits are among the reasons many parents choose wooden toys for their children—and why proper cleaning care becomes a worthwhile investment of time.
Retained value – Well-maintained wooden toys often have resale value. If you’re building a long-term collection, our toys by age guide helps choose pieces worth maintaining across developmental stages. Quality wooden Montessori materials hold their worth in ways plastic toys never do.
This longevity is why the higher initial cost of quality wooden toys often represents better value over time.
Frequently Asked Questions
- Can you wash wooden toys with water?
Yes, but only with a damp cloth—never by soaking or submerging. Wooden toys should be wiped with a cloth dampened in your cleaning solution, then dried immediately. Direct exposure to standing water damages wood.
- Can vinegar damage wooden toys?
Diluted vinegar (1 tablespoon per cup of water) is generally safe when used properly and wiped off promptly. Full-strength vinegar or excessive use could potentially affect some finishes, so always dilute and use sparingly.
- How do you disinfect wooden toys naturally?
A diluted vinegar solution is the most common natural disinfectant for wooden toys. Mix 1-2 tablespoons white vinegar with 1 cup warm water, wipe the toy thoroughly, and dry immediately.
- How often should wooden toys be cleaned?
Light cleaning weekly for regularly used toys, with deeper cleaning monthly or as needed. Clean immediately after heavy mouthing, outdoor play, or exposure to illness.
- Can wooden toys go in the dishwasher?
No. Dishwashers expose wooden toys to excessive heat, high-pressure water, and prolonged moisture—all of which can cause warping, cracking, finish damage, and separation of glued parts.
- How do you remove stains from wooden toys?
For light stains, try a paste of baking soda and water applied gently with a soft cloth. For stubborn stains, very fine sandpaper can smooth the surface, but this removes finish and may require re-oiling. Prevention through regular cleaning works better than stain removal.
Conclusion
Cleaning wooden Montessori toys is simple when you understand what wood needs. Use gentle methods. Avoid soaking. Dry thoroughly. Inspect regularly.
These straightforward practices keep wooden toys safe, hygienic, and beautiful for years. The few extra minutes of careful cleaning preserve toys that can serve multiple children and even generations.
Proper care isn’t complicated—it’s just intentional. And the result? Toys that remain safe, functional, and lovely throughout your child’s entire early childhood and beyond.